Powered by Blogger.

I've gotten so many questions on Instagram and emails regarding Desk Pets, so I decided to put all of the info I have spread across my Instagram feed and other things I've wanted to explain right here in one organized place! This past spring I introduced Desk Pets to my students after learning about them on Instagram and TikTok. Desk Pets are erasers or squishie toys that students can earn. Teachers were using them as an incentive for student behavior, classwork, and homework completion. There are many different ways to use Desk Pets, but I'm going to explain how I used them in my classroom. Disclaimer: there is no "right way" to implement Desk Pets in the classroom. I have a feeling this will be forever evolving as time goes on!

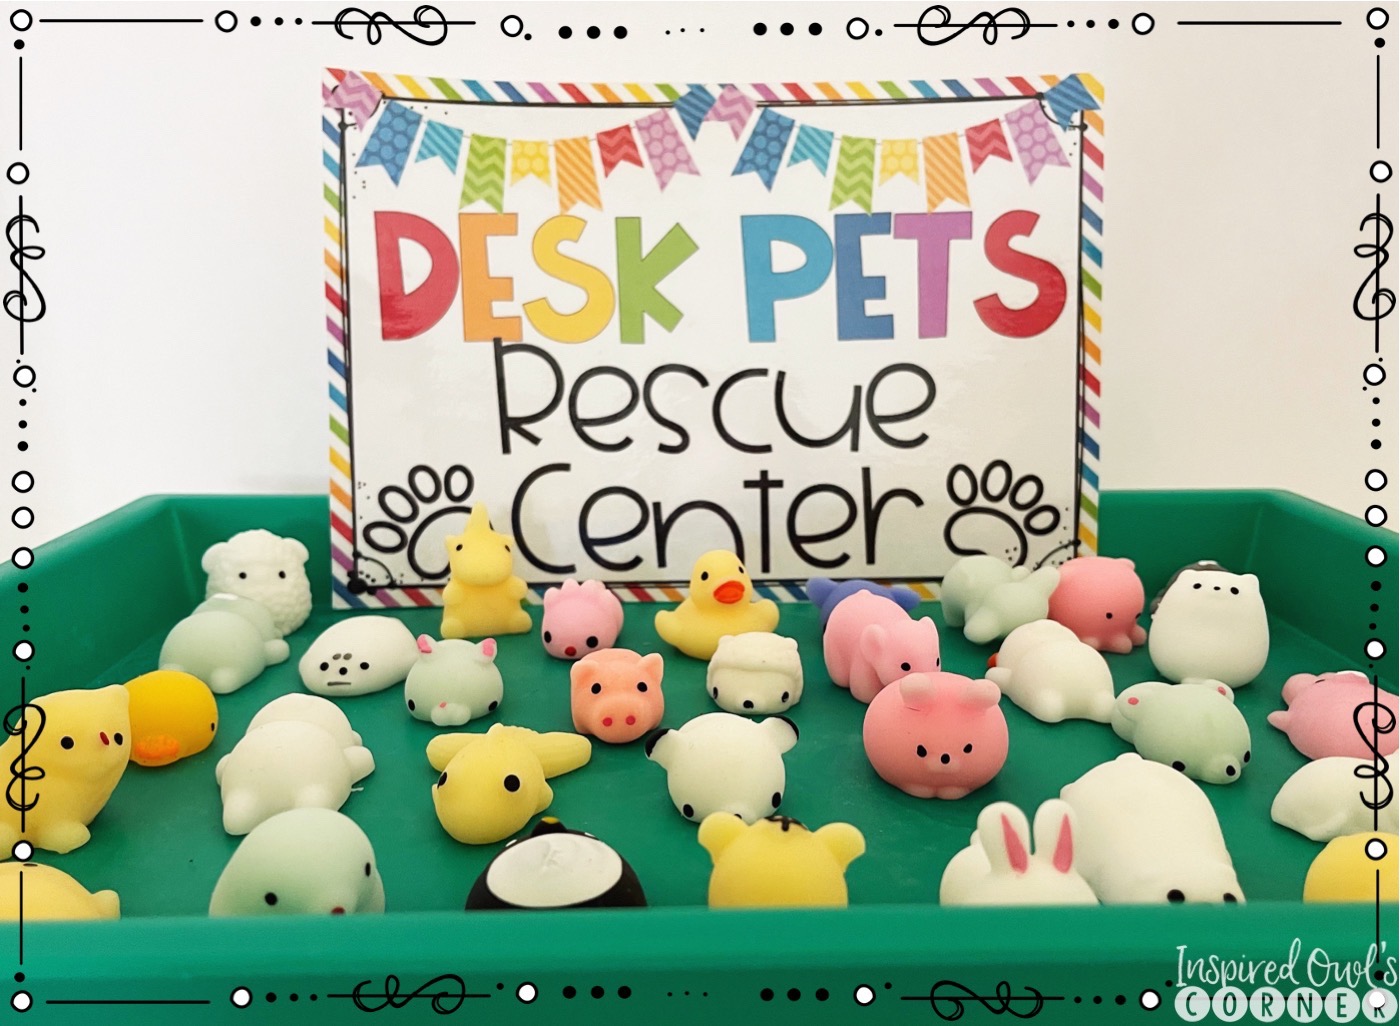
I introduced Desk Pets at the beginning of March. I had the Desk Pets arranged on the green tray shown above. I was using these squishies and these from Amazon. (Later I added these take apart erasers, but my students didn't seem to love them as much as the squishies). (Something we noticed about the Squishies is they would get dirty after they had been handled for awhile. Students just rinsed them off in the sink, and this quickly and easily took care of that problem). I told them that when we had Fun Friday at the end of the week, they would get to choose a Desk Pet to keep at school. They had to show they were responsible to own a Desk Pet by having good behavior and following our Classroom Agreements, completing all of their classwork and homework, turning it in on time, and keeping their desks and areas clean. My students flipped! They were so excited! All week I had the students keep a list of their three top choices of desk pets. On Friday, I had students who previously weren't completing homework earn a Desk Pet! Obviously my students really bought into this incentive. Before I gave them their pets, we went over the ground rules: Desk Pets could sit on top of their desks in their homes, as long as they weren't played with, no trading Desk Pets, no letting others play with your Desk Pet, and no taking them home unless instructed to. Their Desk Pets could watch them work and they could read to their Desk Pets. We went over appropriate times Desk Pets could be played with, mostly before school or during Fun Friday, (that's when we do choice time and students can buy Class Passes at our Class Store), during free time, or at other appropriate times that I would let them know. If students didn't follow those agreements or broke our other Classroom Agreements, their Desk Pet would have to sit in the Day Care Center for a day. 
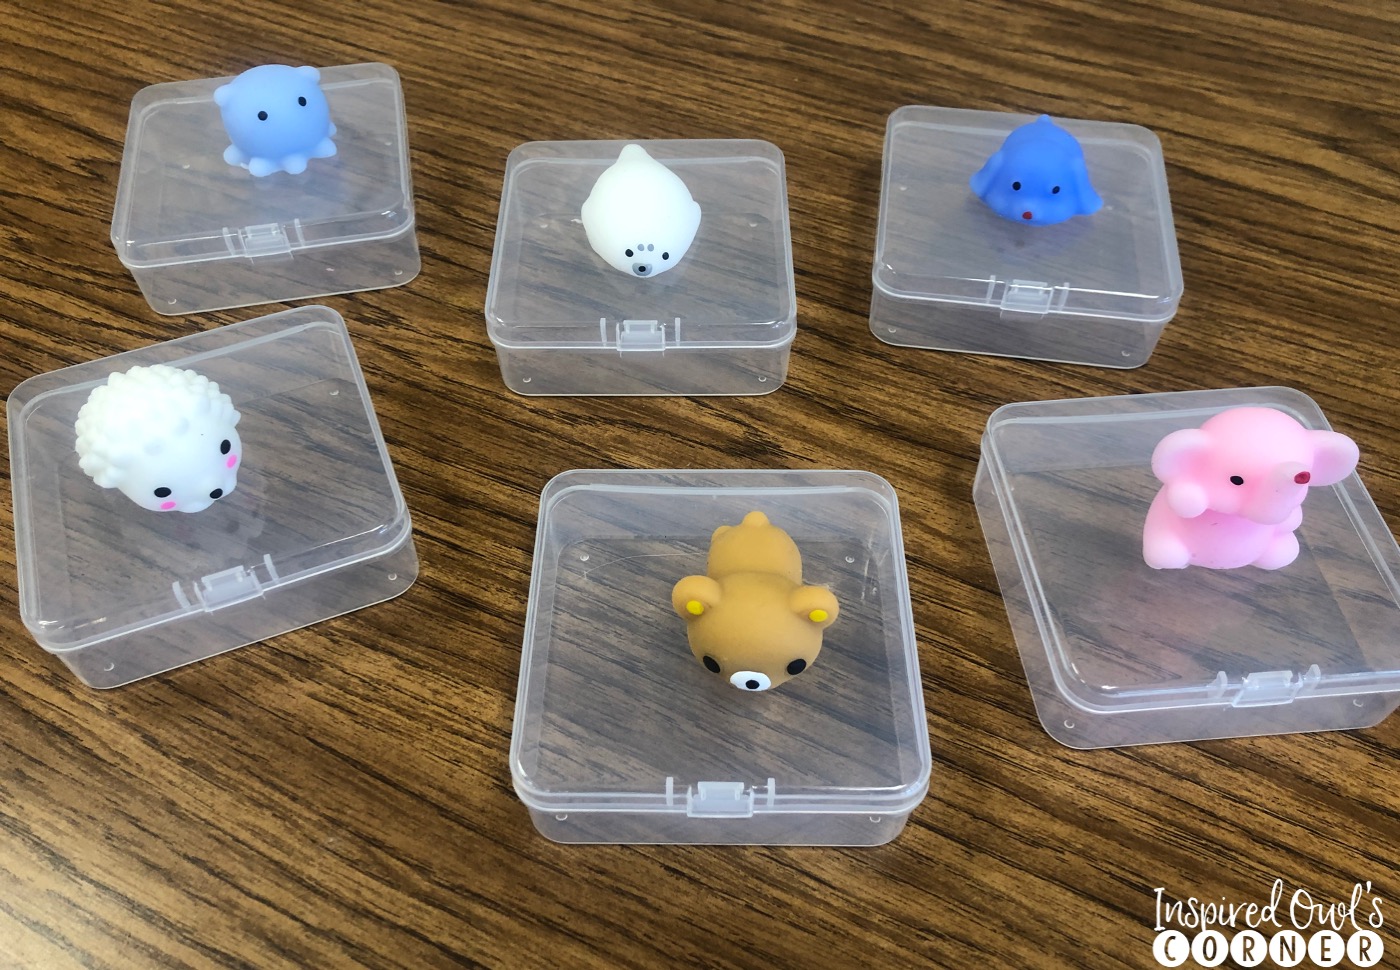
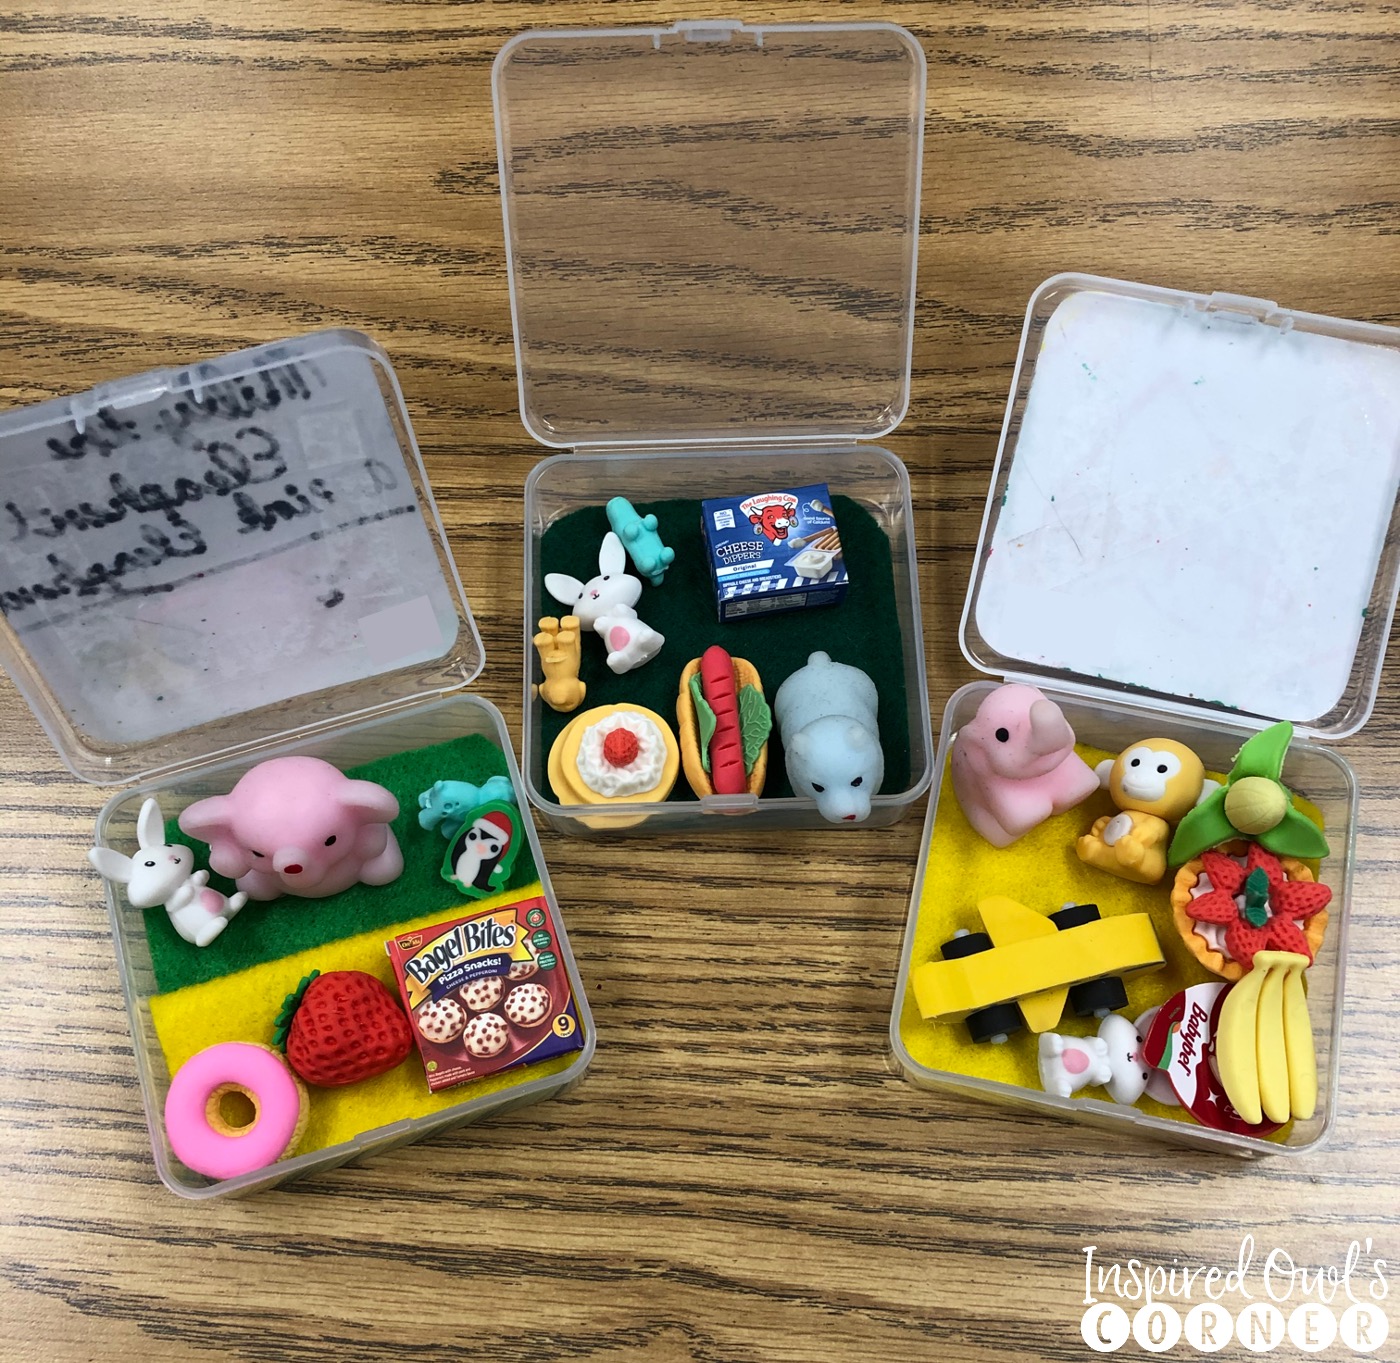
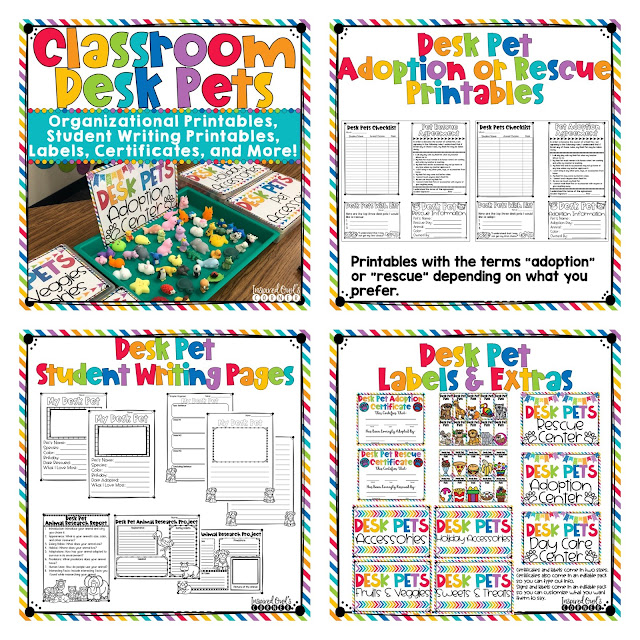
Before I passed out the Desk Pets to the new owners, those students who earned one had to fill out an application. We went over all of the expectations on the Agreements sheet (this is found in the Desk Pets Pack, as well as an editable version that you can customize) and students signed the Agreements sheet. When it was time for students to receive their Desk Pets, I passed them out inside of their homes, (see below) which are small plastic containers that I bought on Amazon here. I was surprised that everyone who earned a Desk Pet got their first choice! (I had about five students who didn't earn one this time around.) The students filled out Information Sheets about their animals, (also in the pack), and I collected those and the Agreements. Before class, I traced and cut out different colors of felt squares for students to choose that would go on the bottom of the houses.  My students were so creative- some asked if they could use the felt as grass, water, or land habitat for their animal!  I also had squares of white construction paper available because one student asked if she could make a personalized sign to decorate the top of her pet's home. They were decorating and customizing their pets' homes! 
The first week with Desk Pets was smooth sailing. I had a few students who didn't earn one the first week work really hard to earn one at the end of the second week. At the end of the second week, during our Fun Friday, those who earned a Desk Pet filled out a Top Three Wish List, and I passed them out along with their homes. Students could choose a felt and paper square if they wanted them. Those who already earned a Desk Pet the previous week and completed all of the weekly requirements could choose three "accessories" to keep inside of their pets' homes. Students who just earned a Desk Pet had to wait until the next Friday to earn the accessories for their Desk Pet. The accessories (see picture below) were small erasers that I had organized into four categories- Fruits and Veggies, Sweets and Treats, Holiday Accessories, and Pet Accessories. If you have been teaching for awhile, you probably have piles of these types of erasers from Target Dollar Spot or other stores that you picked up for your prize box or just to hoard like me! Luckily I had been hoarding the erasers, and the ribbon containers I kept them in were from my old scrapbooking days. I originally bought them at Joann years ago, but I'm sure you could find them there or at another craft store. I found them online for you at Michaels here- much cheaper than the ones I shared with some of you from Amazon, and you could use a coupon and teacher discount! I had erasers from Target Dollar Spot and Oriental Trading, and I found others on Amazon and Five Below (in store, Five Below had limited big packs of erasers for $5.00!). Target Dollar Spot has some foods and treats right now in packs of six for $1.00, if you can find them at your local Target. (The Target link above shows other erasers that are fun, but a little too big to use with Desk Pets, but the picture shows the foods and treats if you want to see what they look like.) My daughter helped me organize the erasers into categories that made sense to me. I created the labels for each container are also in the Desk Pets Pack. There are also customizable labels in a PowerPoint file if you wanted to name them something different than what I labeled them. We continued each Fun Friday by passing out new Desk Pets to those who earned one for the first time and letting the others who already owned a Desk Pet choose three new accessories. 
Since we only had a few months of school left, and I wanted to keep the Desk Pets excitement going, I decided to let them earn a new Desk Pet for April. I let them take their Desk Pets and accessories home on the first Friday of April, but I had them keep the homes at school. Those who earned a new Desk Pet the first week of April followed the same procedures they did in March- they listed their three top Wish List choices and turned that in to me the day before. Some students asked for new felt and paper squares for their new pets' homes, so I let them choose what they wanted. I continued the same procedures for every Fun Friday in April, letting those who earned a Desk Pet for the first time in that month fill out the Wish List and the Desk Pets Information Sheet. We skipped the Agreements page if they previously completed one. Those who already had a Desk Pet for April and completed their requirements for the week could choose three accessories. At the end of April everyone took their pets and accessories home, and we started fresh in May and repeated the process. 
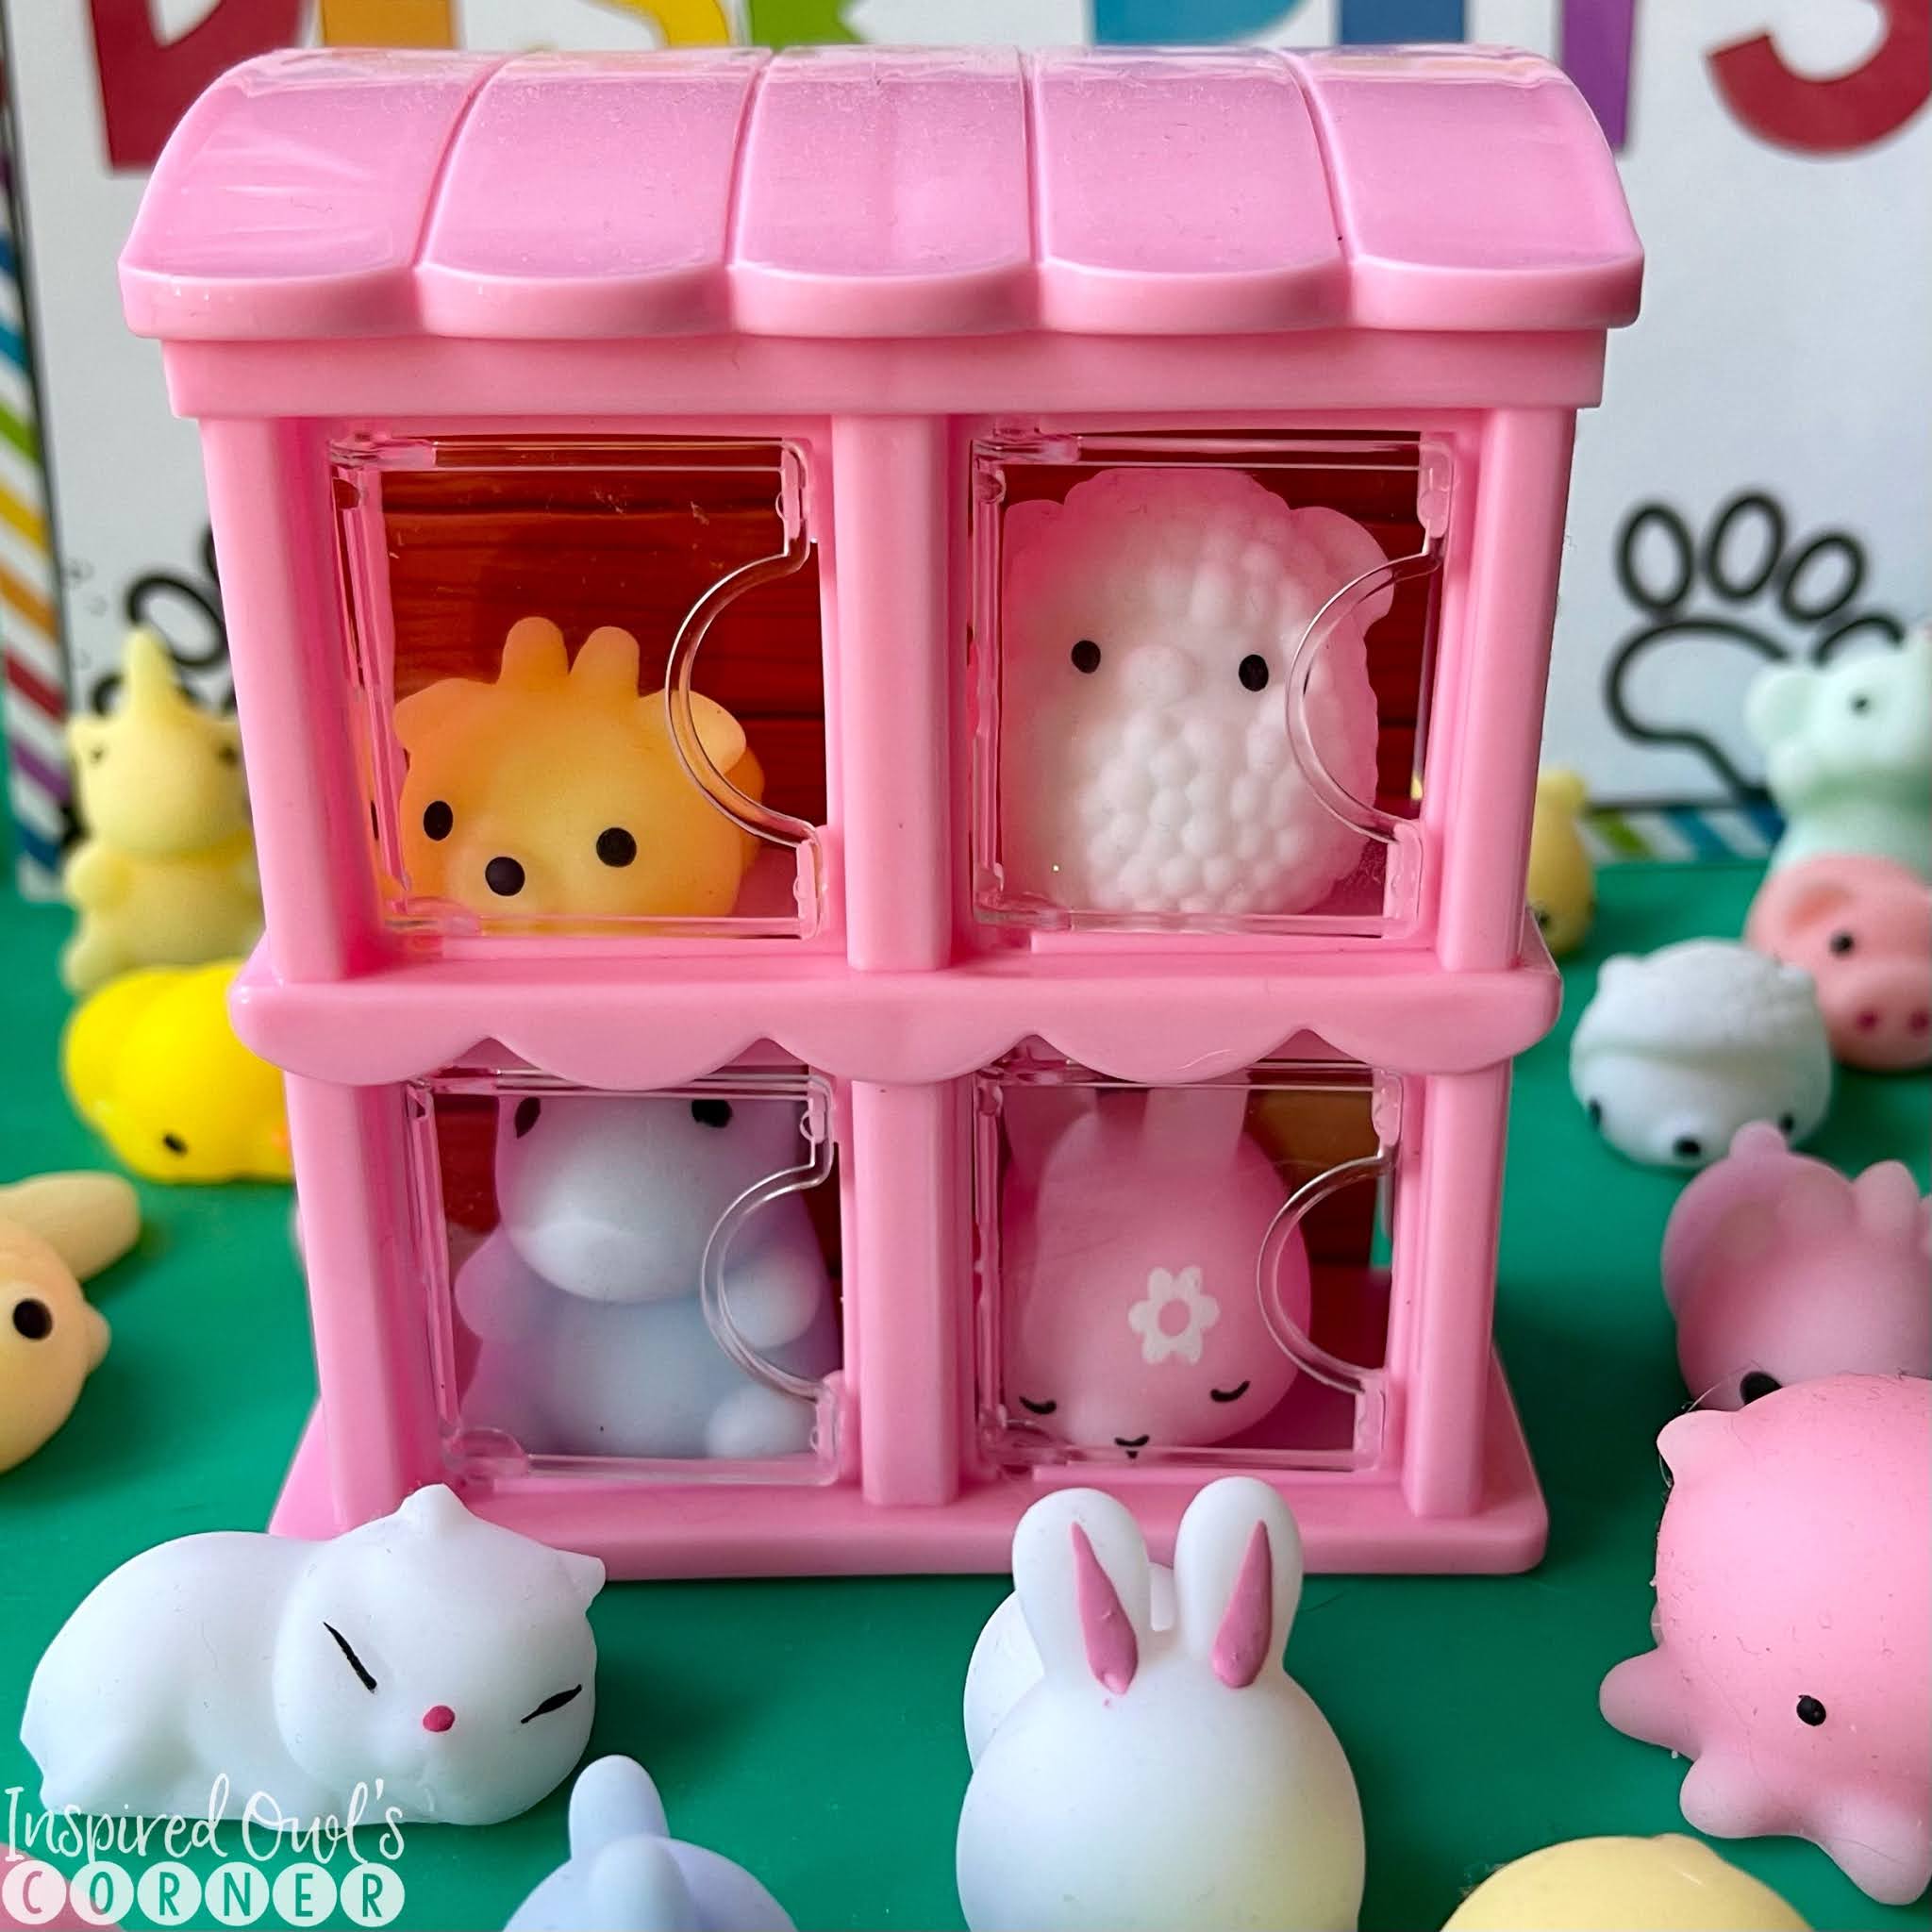
As far as Desk Pets being a distraction, only two Desk Pets had to stay in the Day Care Center since their owners were playing with them during class time after a reminder to not play with them during classtime. That's the only time that happened for the entire three months. For this next year, I plan to use the small house shown below that I found at Dollar Tree in the toy section for my Day Care Center. I've seen some teachers on Instagram use these houses for students to keep their Desk Pets in. The tiny house came with four plastic animals behind each door. I think I'll put those in my prize box. 
The students were so motivated and excited to earn one, and they were so proud of themselves when they reached their goal! Students would send me messages about how much they wanted a certain Desk Pet, and I knew they were working hard to earn the one they wanted. Some who were completing minimal or no classwork and asynchronous work were getting Xtra Math and other assignments completed each day. 

My students gave me ideas for writing assignments that they could do with their Desk Pets. When we started our animal reports, I let them choose which animal they wanted to research. Several chose their Desk Pet species! Students asked if they could write narrative stories about their Desk Pets, and of course I said yes! You can see research and writing pages if you click on the preview here. I have some ideas for more writing activities to add to this pack, based on student feedback. The Desk Pets became an inspiration for writing time! If this gets kids excited about writing, I'm all for it! 

Next year I'm thinking of having the students keep their Desk Pets for a trimester, then at the end of the trimester, having them take them home and earn a new one. I think I'll follow the same procedures with students earning accessories each week, but maybe just one or two instead of three. 

Other accessories I've heard teachers use are these glass stones from Dollar Tree in clear or blue. I had a donation of a few of these Mini Brands and they even have Toy Mini Brands, but those can get expensive, even though they come with six in each package. Some of my students really got excited over those though! :)

The containers I linked above for the houses worked fine last year, but I picked up some of these at Target awhile back to try out next year. My local Target has been out of them, so I don't know if they are being discontinued, but they are a little cheaper on Amazon and larger than the square ones I used last year. If my students are going to keep their Desk Pets and accessories for the whole trimester, they might need a larger "house". You can also look at Dollar Tree for Desk Pet homes. Some teachers have storage containers in the kitchen section and plastic soap travel containers in the health/toiletries section. 

Since I already had tons of small erasers and all of the containers I used to organize Desk Pets, it wasn't too expensive for me to implement. The squishies and erasers aren't as expensive as some of the items I used to buy in my class store. I will also welcome donations from families if they offer to donate to the class. 

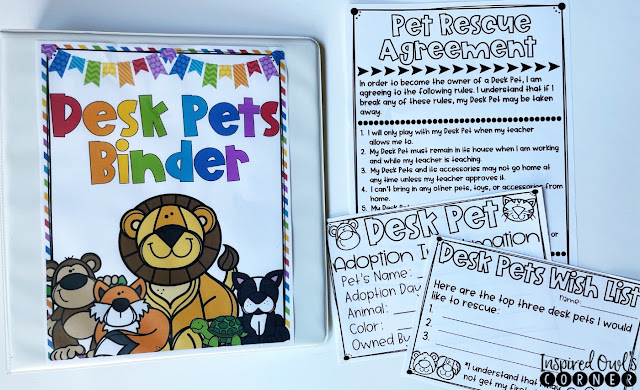
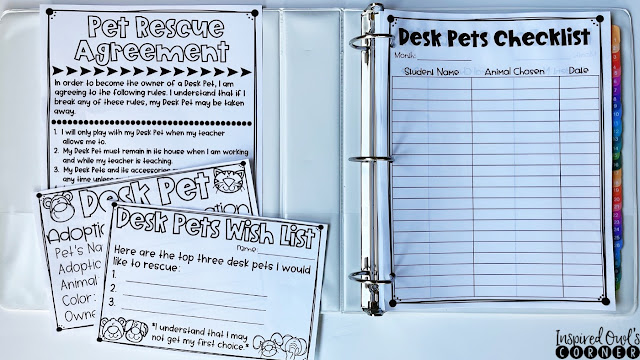
As far as organization for all of the Desk Pets information, I'm planning to use the binder shown below to organize everything. I have the Desk Pets binder cover in the pack I linked above, and I'll keep the Desk Pets Checklist, the Desk Pets Information pages and the Agreement pages in the binder. I bought these numbered binder organizer tabs (see second picture below) to keep each students' printables organized. Last year I had all of the printables paper clipped together and it was a bit of a mess! The Checklist will be in the front. I thought this could also be used as my classroom management/parent communication binder. 

It was brought to my attention that calling it a "Desk Pet Adoption Center" and referring to adoption on the Desk Pets sheets might be hurtful to students who have been adopted, making them feel like their experience is being equated to finding a home for an animal. I have friends who are adopted, and it never occurred to me that this might be hurtful. I don't want to possibly hurt anyone's feelings, so I changed the sign on my Desk Pets tray to "Desk Pets Rescue Center, and instead of students "adopting" a pet, they can "rescue" them. (All of the labels and pages in the Desk Pets Pack I made come in "adoption" and "rescue" versions depending on which is appropriate).

Desk Pets brought my class so much excitement and joy during what was the worst year we've ever had. If you are thinking about doing Desk Pets next year, I think you should jump right in and give it a try! There really isn't a right or wrong way to use them, and like everything else with teaching and life, you live and learn, tweak things, and make it work better for you. I hope this very long post has been helpful to you as you get started on your Desk Pets journey. Let me know if you have any questions or ideas about how you will use them. And let me know how it goes next year if you do use them! I know using Desk Pets in my classroom will be ever-evolving based on the ideas and needs of my students. 

PIN FOR LATER


Vocabulary and Word Work Ideas and Freebies- inspiredowlscorner.com
I wanted to share some fun ideas for vocabulary and word work that we've been using this year. I've been trying different activities to get my students practicing our vocabulary words. I try to sprinkle as many fun, game-like activities as I can throughout our day. Vocabulary is an easy one to incorporate some fun into. We don't do every activity every week. I have found the key to keeping the magic alive is mixing things up often!

My class LOVES playing Magic Hat Vocabulary. They either pull a card out of the hat, or there are plastic bunnies inside the hat with vocabulary cards inside of them. The students tell what the word means, the part of speech, and use correctly in a sentence. This gives us a chance to really practice the words. Learning Resources used to sell the hat I have, but you can find inexpensive magician's hat and wands on Amazon. You can find the bunnies at The Dollar Tree around Easter. The kids adore the novelty of this! 
Fun and engaging vocabulary and word work ideas and activities. Grab the freebies for your 1st, 2nd, 3rd, or 4th grade classroom.
If you would rather not use a hat, you can use a large paper lunch bag. I created a cover for the bag, and editable cards. If you would like to download this freebie, click on either of the pictures. 
Another fun activity we play in my classroom is Swat That Vocab Word. I display the vocabulary cards for the week in a small pocket chart, and students play two at a time, and whoever swats the correct word with a (clean) flyswatter first, is the winner. I usually have one student give the definition, and the other student uses it correctly in a sentence, but I like to mix it up. This gives us so many opportunities to discuss the words and language- synonyms, antonyms, suffixes, prefixes, etc. You can click on the picture below to grab this freebie. 
Swat That Vocab Word Freebie
Hot Potato Vocab is another fun game we play. I bought my Hot Potato Game at Target after seeing it posted on Instagram. The vocabulary cards are inside the paper bag, and students pass around the hot potato. When the music stops, the student holding the potato has to pick a word out of the bag and give the same vocabulary information as the previous games. If you would rather not purchase the game, you can just pass a paper bag around with the words inside and play music in the classroom. When the music stops, whoever is left holding the bag has to choose a word. You can download the printables and vocabulary words by clicking on the picture below. 
Hot Potato Vocab Freebie
I wanted to share a bit of what we are currently doing during Spelling/Word Work time. When I was in fifth grade, by favorite teacher had monthly themed spelling sheets that had several spelling activities on them. What I loved most was getting to choose what I wanted to work on. I decided to create something similar for my students. There are separate monthly sets, (and a few other spelling packs shown) or a bundle that now includes the entire year! I've been using these during my literacy block rotation, but they would be great to send home as homework too. 
Fun and engaging spelling and word work activities for your 2nd, 3rd, and 4th grade classroom. Perfect for literacy centers and homework. #spellingactivities #wordwork #literacycenters
I have several other spelling and word work ideas and freebies in this post if you would like to check it out.
hope I've given you some useful tips you can implement into your day to make things fun and engaging. I would love to know if you have any other ideas to make spelling and vocabulary practice meaningful and engaging for your kiddos! :)


I'm excited to link up with Tara from 4th Grade Frolics for Monday Made It! I missed the last MMI because things were really hectic getting ready for my daughter's birthday party and various other things!
Speaking of birthdays, I love spoiling my students on their special day. Last year I was scrambling to find things to give them for their birthday present. I decided I didn't want to stress myself out, so I would prep everything over the summer. 
Student Birthday Ideas and Printables

I'm fortunate that my school has a wonderful parent club that allots us a nice budget for things like this, so I don't have a lot of out of pocket expense. I found the adorable birthday pails and the tray to hold them at Target. My plan is to have this tray inside my cabinet, and when it's the birthday kiddo's special day, I will grab what I need to give him/her. I found the birthday pencils here and the wrist bands here. I created a pack here that includes the balloons, bookmarks, homework passes, certificates, cards, candy bar labels, and badges students can wear. 
Student Birthday Ideas and Printables
I found the easel sign at Target and added a sign to it. The cute travel mugs are from Dollar Tree here. I've been hoarding the crazy straws forever and I don't remember where I bought them, but you can find similar ones here or here
Student Birthday Ideas and Printables
I laminated and taped the balloon label to the straw. In the past I've taped the balloons to Pixy Stix or pencils. I'm planning to laminate the cup labels before I place them inside the cup. (I'm not sure how waterproof the Dollar Tree cups are, so I thought it would be best to protect them. I don't think I will use my personal laminator with the thick film, but the school laminator should work ok.) Another option would be to get these 12, 16, or 18 oz. cups here or here. Maybe the local coffee shop would donate some if I ask. :) 
FREEBIE Happy Birthday Granola Bar Labels
There are rumors that next year we won't be able to give out any sweets at my school. I'm hoping I can at least give my students a reduced sugar granola bar, so I made a set of labels for them. If you want to grab the freebie set, you can click on the picture above or head here and download the preview to the birthday pack. 
Pin This Image for Later
Student birthday pack perfect for your 1st, 2nd, 3rd, or 4th grade students. Included are cup labels, topper labels, certificates, birthday badges, passes, and cards.
My next MMI project I finally finished yesterday after working on it for an entire year! I'm changing up my focus wall, and I started working on these posters last year, but finally got them all completed!

Last year I tried using three huge binders to keep all of the resources for the 6 units of my district's new reading program. I put two units in one binder, but all of my posters and copies would fall out of the page protectors, the pages wouldn't turn correctly, and it was a huge  mess! I decided to use the large open-top file boxes from The Container Store in the photo below and hanging file folders to keep everything organized this year. Our units are divided into weeks, and each of the 6 units has five weeks. I put everything I need for each week in a hanging file folder. Hopefully it will keep me organized!

Below are the posters I am going to use for my second grade class. You can check them out here.
That's what I've been up to the past few weeks. I have today off, then have to get back into my classroom tomorrow! The kids come next Monday! 
Have a great week! :)

SaveSaveSaveSave
SaveSave
SaveSave
I'm excited to be guest blogging for Tara from Middleschool Frolics today! Come check out my post and learn more about my projects below! There are some freebies to grab too! :) Just click HERE to  check it out!


Used Kahoot to review and practice skills as well as for formation and summative assessments.

Today I'm going to share with you a website that has added so much fun to my students' learning. Kahoot is a game-based classroom response system that can be used for review, practice and formative and summative assessment. It can give a quick snapshot of students' learning or need for additional teaching. It has added a new element of excitement to my classroom. In fact, students even ask to play it for fun! I recently began having my students make their own Kahoots to show what they have learned. These have been perfect as final projects for our Genius Research Projects. Students could also work in groups to create Kahoots. What a great way to get students motivated to show all they have learned! 

I created the Kahoot below for extra math practice. It took me about ten minutes to make a ten problem Kahoot. What you see on my device is a Kahoot game projected onto my overhead screen. The students have a certain amount of time to answer each question I had already typed out. Fun game show themed music plays and a running clock with a tick-tock sound is heard during play.
This is what the students' devices look like during play. They choose the color for the correct answer. Messages appear throughout the game letting the students know how they are doing compared to others. 
Below is a Kahoot a student was in the process of making for his Genius Project. He chose to research the Oakland A's baseball team for his project. He created questions from his research to make his Kahoot. After students have completed their Kahoots, I have them self-edit and revise, then have a peer edit and help them fix any mistakes in their Kahoot. Their final projects will also be graded on spelling, punctuation, and grammar. 
After reading this student's Kahoot, I encouraged him to add four answer choices to make his Kahoot more challenging, instead of making it a simple yes/no answer choice like he did in the picture above. By having your students create their own Kahoots, you can easily assess their learning based on the questions and answers they include. 

Below is what the student's Kahoot looks like in preview mode. Students are able to preview and play their Kahoots, then go back and edit them if necessary.
My entire district received 1:1 devices this year, but I know not every classroom has enough devices for every student. If you have a few iPads, iPods, or other devices available to your students, you could have them work in teams and play Kahoots you give them or have them create their own Kahoots. Students can even bring their own devices from home and link up with you over wi-fi. If all you have is your computer and you are able to project from it, you could use the free printable tablets I created below. Students can point to the color or shape and you could still use Kahoot to quickly assess their learning that way. (You wouldn't be able to print out their individual assessment data, and you would have to choose the correct answer from your device for each question.) This would still be a great way to review. There are a few choices of sizes and color and black and white.
Making a Kahoot is just the beginning! You can download each students' score and use it as an assessment. If you decide to do that, I would make sure the students use their name and maybe a number as their username so you can easily see which score belongs to which student. You can also search for already made Kahoots and use them as is or edit them to make them work for your class. 

Below I've included step-by-step directions if you would like to make your own Kahoot. Creating an account and making my first Kahoot was very easy. The most challenging part of the whole process was when I was ready to play a Kahoot with the class. You have to keep the game projected on www.getkahoot.com, but your students have to go to www.kahoot.it to type in the pin number and log onto your game. 

You can click on the graphic below to get your own copy of step-by-step directions to make your own Kahoot. I've included pictures along with the step-by-step directions.
Click on the graphic below to visit Kahoot.
I hope Kahoot becomes a useful tool in your classroom.  What other websites are must-haves in your teacher technology toolkit? I would love to hear what you use in your classroom! 
Image Map

Before I began making files to use in my classroom a few years ago, I had never worked in PowerPoint. I always thought of it as presentation software, not something you would use to produce a file to print out. I never purchased anything on TpT that required me to edit in PowerPoint because I didn't feel comfortable using it. After using PowerPoint, I quickly realized that it's easy to use and create editable items. I have had several questions from followers about how to use these editable files, so today I wanted to share a few things I have learned along the way. (If you are already a pro at this, you can skip down to the bottom and grab a fun freebie!)

***Disclaimer: I'm a Mac girl. There are some differences between the Mac and PC versions of PowerPoint. Older versions of PC PowerPoint don't have the Color Picker/eyedropper tool I mention in the tutorial, but the new version does. There are color picker tools you can download if you are interested in looking into that. Years ago I used one with Photoshop Elements that worked really well. 

One of the most important things I want to share is that in order to use a font that's in an editable PowerPoint file, you have to have the font installed on your computer. There has been confusion about this, but you can't use a font that isn't installed on your computer. Many times TpT sellers include a list of fonts they used in their editable PowerPoint files so you can get a similar look for your edits. On my Macbook Pro, it's easy- I just download the font and click "Install". I have to restart PowerPoint in order for the font to be useable, but once I do that, it's there for me to use. If you need help with installing fonts, check here.

Another important thing to remember is to save your edited file as a different name. I usually add "revised" or "edited" to the end of the original file name, but you can name it whatever you like. That way you can keep your original file and your edited file. (Although the good thing about TpT is they always have the original files you purchased, so you can always re-download if you accidentally edit and save the original instead of renaming it.) 

Below I will go through the steps I use to change my font style, color, and size on a poster in my Classroom Decor pack.

 You might want to add text boxes to a page. The slides below explain how to do that.

Sometimes I want to make duplicates of a page such as my desk name tags. Once I choose my text style, size, and color, the text box is already formatted, so it's really easy to just duplicate the slide I want to use to create my entire class's desk tags. The slides below explain this. 


Here's a freebie for you. Included are two sets in both editable and premade versions so you can customize them for the supplies you have. They have helped me to keep my desk organized and I can easily see what supplies I have before I go out and spend more money on things I don't need. These also make great gifts for new teachers and colleagues. Click on any of the pictures to download a copy.
Thank you for stopping by! 

(This is an archived post from the iTeach Third Blog.)
Back to Top